

There’s something magical about slicing into a jelly roll and revealing that perfect spiral of cake and filling. This delightful dessert, with its tender sponge cake wrapped around sweet jam or cream, has been gracing dessert tables for generations. What makes it even better? Despite its impressive appearance, this rolled cake is surprisingly simple to create at home. Whether you’re preparing it for a special celebration or just craving something sweet, a homemade jelly roll never fails to impress both the eyes and the taste buds.
The Sweet History Behind Jelly Rolls
The jelly roll has quite an interesting journey through culinary history. Originally, this elegant dessert emerged in Central Europe during the 19th century, where bakers discovered that a thin, flexible sponge cake could be rolled while still warm. From there, it traveled across the Atlantic and quickly became an American household favorite. Interestingly enough, different cultures have embraced this dessert with various names. The British call it a Swiss roll, while others refer to it simply as a rolled cake. Regardless of what you call it, the concept remains beautifully simple: a light, airy cake that’s versatile enough to pair with countless fillings. Throughout the years, home bakers have passed down their techniques, transforming this European classic into a beloved treat that continues to bring joy to families everywhere.
Ingredients list of Jelly Rolls Recipe with pictures
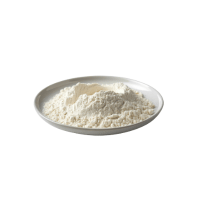
All-Purpose Flour – This forms the structure of your cake, providing just enough support while keeping the texture light. The protein content in all-purpose flour creates a delicate crumb that’s flexible enough to roll without cracking.
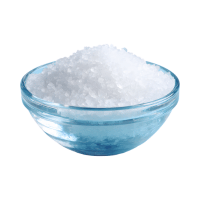
Granulated Sugar – Beyond adding sweetness, sugar helps create that beautiful golden color and contributes to the cake’s tender texture. Additionally, it helps the eggs whip up to maximum volume, which is crucial for a light sponge.
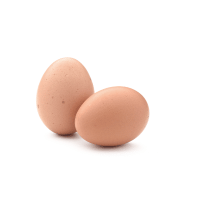
Large Eggs – These are absolutely essential because they provide structure, moisture, and that airy lift we’re looking for. When beaten properly, eggs trap air bubbles that make the cake rise beautifully in the oven.
Baking Powder – This leavening agent gives your cake an extra boost, ensuring it rises evenly and develops that perfect, soft texture. Without it, your jelly roll would be dense and difficult to roll.
Salt – Just a pinch enhances all the other flavors and balances the sweetness. Moreover, it strengthens the protein structure in the batter, resulting in better texture.
Vanilla Extract – This adds depth and warmth to the flavor profile, complementing whatever filling you choose. Pure vanilla extract makes a noticeable difference in the final taste.

Vegetable Oil – Unlike butter, oil keeps the cake incredibly moist and prevents it from becoming dry or brittle. This moisture is what allows the cake to roll smoothly without breaking.

Milk – Adding liquid creates the right batter consistency and contributes to a tender crumb. Furthermore, it helps distribute all the ingredients evenly throughout the mixture.

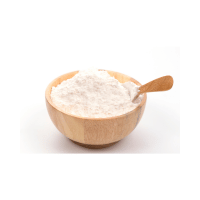
Powdered Sugar – Used for dusting, this prevents the cake from sticking to the towel during rolling and adds a lovely finishing touch. It also provides a subtle sweetness to the exterior.
Jam or Jelly – Your filling of choice brings flavor and moisture to every bite. Traditional options include strawberry, raspberry, or grape, but feel free to experiment with your favorites.
Ingredient Measurements at a Glance
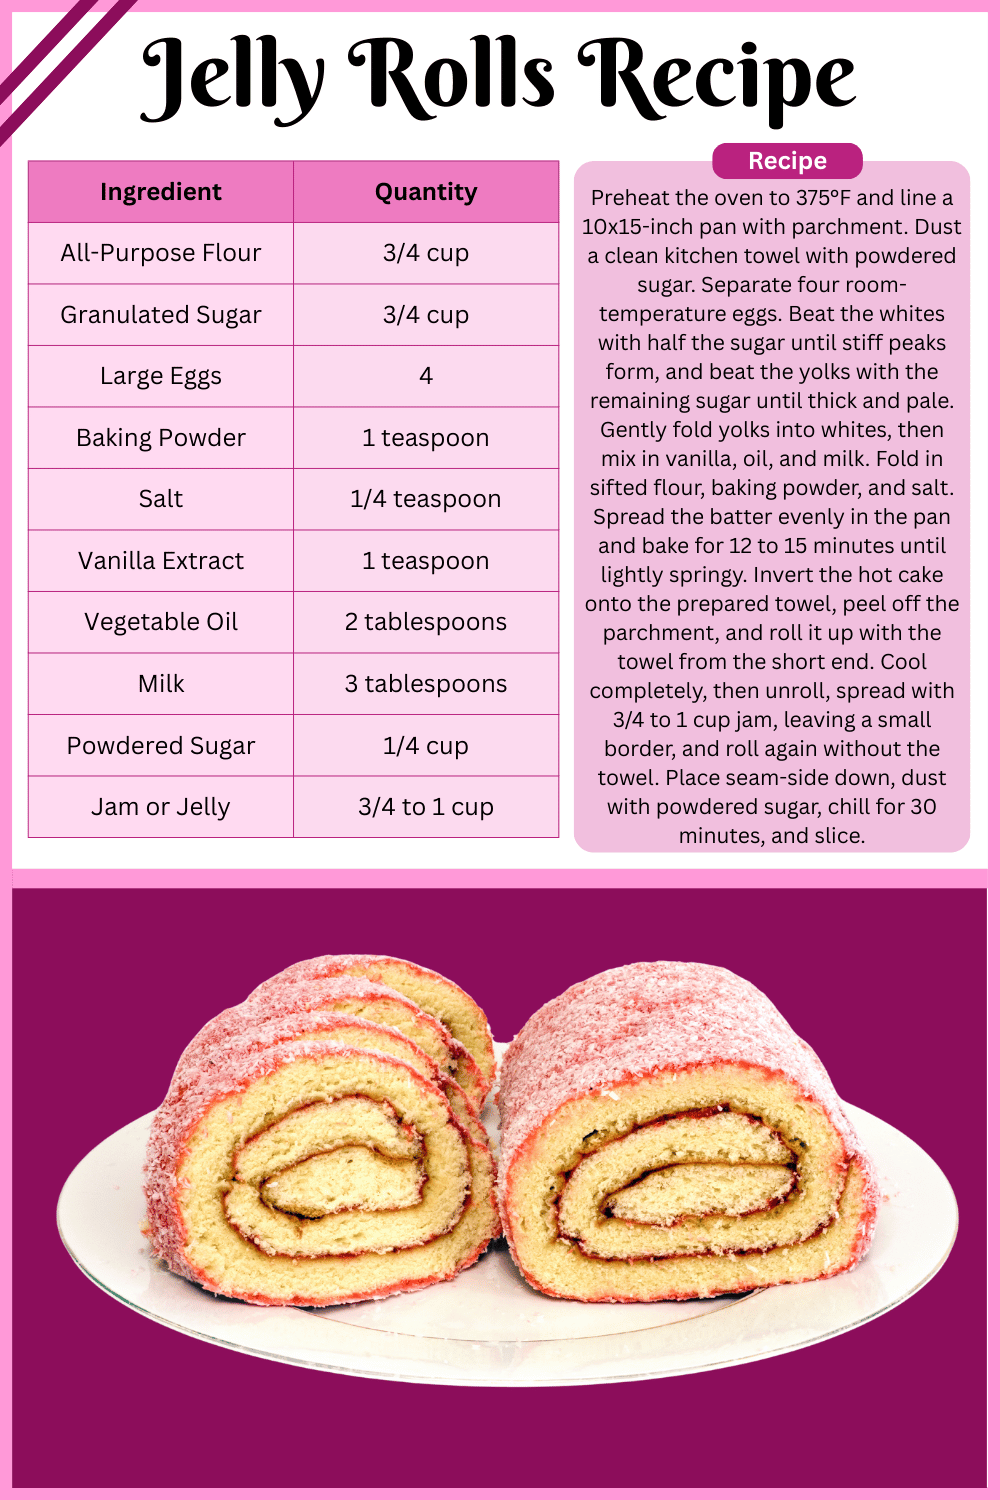
| Ingredient | Quantity | Notes |
|---|---|---|
| All-Purpose Flour | 3/4 cup | Sifted for best results |
| Granulated Sugar | 3/4 cup | Divided use |
| Large Eggs | 4 | Room temperature |
| Baking Powder | 1 teaspoon | Fresh for maximum rise |
| Salt | 1/4 teaspoon | Fine table salt |
| Vanilla Extract | 1 teaspoon | Pure extract preferred |
| Vegetable Oil | 2 tablespoons | Or neutral oil |
| Milk | 3 tablespoons | Whole milk works best |
| Powdered Sugar | 1/4 cup | For dusting |
| Jam or Jelly | 3/4 to 1 cup | Your favorite flavor |
Step by Step Jelly Rolls Recipe
Step 1: Prepare Your Workspace
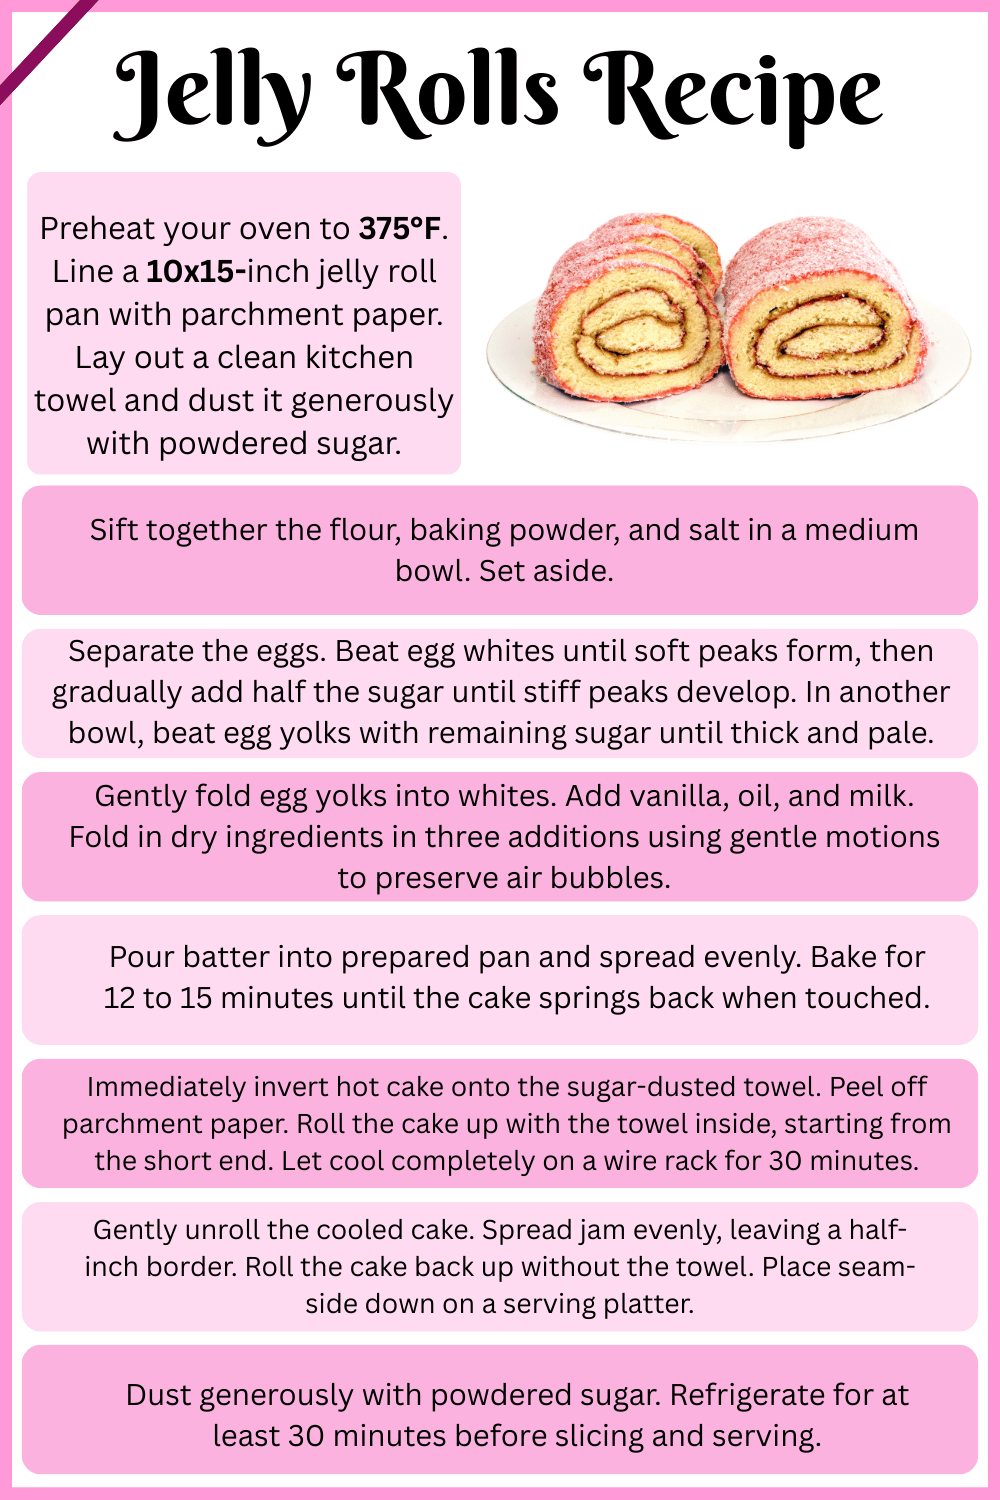
First and foremost, preheat your oven to 375°F (190°C). Meanwhile, line a 10×15-inch jelly roll pan with parchment paper, making sure it extends slightly over the edges. This preparation step is crucial because it prevents sticking and makes removal much easier later on. Next, lay out a clean kitchen towel on your counter and generously dust it with powdered sugar. This towel will play a vital role in the rolling process, so don’t skip this important step.
Step 2: Mix the Dry Ingredients
In a medium bowl, sift together the flour, baking powder, and salt. Sifting might seem old-fashioned, but it actually makes a significant difference by removing lumps and aerating the flour. Consequently, your cake will have a lighter, more uniform texture. Set this mixture aside while you work on the wet ingredients.
Step 3: Beat the Eggs
Now comes the most important step for achieving that perfect rise. Separate your eggs, placing the whites in one large bowl and the yolks in another. Using an electric mixer, beat the egg whites on high speed until soft peaks form. Gradually add half of the sugar while continuing to beat until stiff, glossy peaks develop. This process usually takes about 3 to 4 minutes. In the separate bowl, beat the egg yolks with the remaining sugar until the mixture becomes thick and pale yellow. This color change indicates that you’ve properly incorporated air into the yolks.
Step 4: Combine Everything Carefully
Gently fold the egg yolks into the beaten egg whites using a rubber spatula. Use a folding motion rather than stirring to preserve all those air bubbles you’ve created. After that, add the vanilla extract, oil, and milk, folding just until combined. Finally, sift the dry ingredients over the egg mixture in three additions, folding gently after each addition. Remember, the key word here is gentle – overmixing will deflate your batter and result in a dense cake.
Step 5: Bake to Perfection
Pour the batter into your prepared pan, spreading it evenly to all corners with an offset spatula. Tap the pan gently on the counter to release any air bubbles. Slide it into your preheated oven and bake for 12 to 15 minutes. You’ll know it’s ready when the cake springs back lightly when touched and the edges just begin to pull away from the pan. Importantly, don’t overbake, as this will make rolling much more difficult.
Step 6: The Critical Rolling Stage
Here’s where timing becomes everything. The moment your cake comes out of the oven, immediately run a knife around the edges to loosen it. Quickly invert the pan onto your prepared, sugar-dusted towel. Carefully peel off the parchment paper – it should come away easily if you greased the pan properly. Starting from one short end, roll the cake up with the towel inside. This step must happen while the cake is still warm and pliable. Place the rolled cake seam-side down on a wire rack and let it cool completely, which typically takes about 30 minutes.
Step 7: Fill and Re-roll
Once your cake has cooled, gently unroll it on a flat surface. The cake should now hold its curved shape, making the final roll much easier. Spread your chosen jam or filling evenly over the surface, leaving about a half-inch border around the edges. This border prevents the filling from squeezing out when you roll. Using steady, even pressure, roll the cake back up without the towel this time. Transfer it to a serving platter with the seam side down.
Step 8: Final Touches
Dust your beautiful creation generously with powdered sugar using a fine-mesh sieve. For an extra special presentation, you can create diagonal stripes by laying strips of paper across the top before dusting, then carefully removing them. Refrigerate for at least 30 minutes before slicing to help everything set properly.
Step by Step Jelly Rolls Recipe
Common Mistakes That Can Ruin Your Jelly Roll
Overbaking the Cake
This represents one of the most frequent errors home bakers make. When you leave the cake in the oven too long, it becomes dry and brittle, making it nearly impossible to roll without cracking. The cake should still feel slightly moist and springy when you remove it. To avoid this problem, start checking your cake at the 10-minute mark. Remember, it continues cooking slightly even after you remove it from the oven due to residual heat.
Waiting Too Long to Roll
Timing is absolutely critical when making a jelly roll. If you wait until the cake cools completely before the initial roll, it will crack and break apart. The warmth keeps the cake flexible and pliable. As soon as you invert the cake onto the towel, you should begin rolling. Those few minutes of delay can mean the difference between success and frustration.
Using Too Much Filling
While it’s tempting to load up your jelly roll with filling, restraint actually works in your favor here. Excessive filling causes several problems: it squeezes out the sides, makes rolling difficult, and can make slices messy. A moderate, even layer about 1/4 inch thick provides plenty of flavor without overwhelming the delicate cake. Think of it as enhancing the cake rather than drowning it.
Skipping the Towel Dusting
Some bakers try to skip dusting the towel with powdered sugar, thinking it’s just for decoration. However, this sugar coating serves a practical purpose by preventing the cake from sticking to the towel. Without it, when you unroll the cake to add filling, chunks might tear off and ruin your presentation. Always dust generously – you can never use too much powdered sugar for this step.
Not Sifting the Flour
Taking the time to sift your dry ingredients might seem unnecessary, but this simple step prevents lumps and creates a lighter texture. Unsifted flour can result in a dense, heavy cake that resists rolling. Additionally, sifting helps distribute the baking powder evenly, ensuring consistent rise throughout the cake.
Nutritional Information
| Nutrient | Per Slice (1/10 of roll) |
|---|---|
| Calories | 185 |
| Total Fat | 4g |
| Saturated Fat | 1g |
| Cholesterol | 75mg |
| Sodium | 120mg |
| Total Carbohydrates | 34g |
| Dietary Fiber | 0.5g |
| Sugars | 24g |
| Protein | 4g |
| Vitamin A | 4% DV |
| Calcium | 3% DV |
| Iron | 6% DV |
Note: Nutritional values are approximate and vary based on specific ingredients and filling used.
Expert Tips for Best Jelly Roll Recipe
Achieve Perfect Room Temperature Eggs
Cold eggs don’t whip up as well as room temperature ones. Therefore, take your eggs out of the refrigerator about 30 minutes before you start baking. If you’re short on time, place them in a bowl of warm water for about 5 minutes. This simple trick helps the eggs reach optimal temperature quickly. Room temperature eggs incorporate more air, which directly translates to a lighter, fluffier cake that rolls beautifully without any resistance.
Master the Folding Technique
Learning to fold properly makes all the difference between a light, airy cake and a dense disappointment. Use a large rubber spatula and cut down through the center of the mixture, then sweep along the bottom and up the side. Rotate the bowl slightly and repeat. This motion preserves the air bubbles you worked so hard to create. Practice makes perfect, so don’t get discouraged if your first attempt isn’t flawless. Each time you make a jelly roll, your folding technique will improve.
Choose Your Filling Wisely
Not all fillings work equally well in jelly rolls. Thick, spreadable options like jam, preserves, or buttercream work best because they stay put and don’t make the cake soggy. Conversely, very thin or liquid fillings can soak through the cake, making it difficult to slice cleanly. If you want to use fresh fruit, combine it with whipped cream or cream cheese frosting to provide structure. The filling should complement the delicate cake without overpowering it.
Create Clean, Beautiful Slices
Getting those perfect spiral slices requires the right technique. First, make sure your jelly roll is completely chilled – this firms up both the cake and filling. Use a sharp, serrated knife and wipe it clean between each cut. Saw gently rather than pressing down, which can squash the delicate cake. Each slice should reveal a clean, distinct spiral that showcases your hard work.
Store Properly for Maximum Freshness
A jelly roll stays fresh for several days when stored correctly. Wrap it tightly in plastic wrap to prevent it from drying out, then refrigerate. Because of the moisture in the filling, room temperature storage isn’t recommended for more than a few hours. Interestingly, you can also freeze jelly rolls for up to three months. Just wrap them well in plastic wrap, then aluminum foil. Thaw overnight in the refrigerator before serving.
Delicious Variations to Try
Classic Chocolate Jelly Roll
Transform your basic recipe into a chocolate lover’s dream by replacing 1/4 cup of the flour with unsweetened cocoa powder. Sift the cocoa with the other dry ingredients to ensure even distribution. This creates a rich, dark cake that pairs wonderfully with vanilla cream, chocolate ganache, or even peanut butter filling. Furthermore, you can dust the finished roll with cocoa powder instead of powdered sugar for a sophisticated look. The chocolate version offers a deeper flavor profile that appeals to those who find traditional jelly rolls a bit too sweet.
Lemon Blueberry Delight
For a refreshing twist, add the zest of two lemons to your cake batter. The citrus brightens the flavor considerably. Then, mix fresh or frozen blueberries with lemon curd for the filling. This combination tastes like summer in every bite. The tartness of the lemon balances beautifully with the sweet cake, while the blueberries add texture and visual appeal. This variation works especially well for spring and summer gatherings when you want something lighter and more refreshing.
Pumpkin Spice Roll
When autumn arrives, incorporate 1/2 cup of pumpkin puree into your egg yolk mixture and add warm spices like cinnamon, nutmeg, and ginger to the dry ingredients. Fill it with sweetened cream cheese frosting mixed with a touch of maple syrup. This seasonal variation has become so popular that many bakeries offer it specifically during fall months. The spices create a warming, cozy flavor that perfectly captures the essence of the season.
Strawberry Cream Roll
Mix fresh sliced strawberries into stabilized whipped cream for a lighter, fruit-forward option. To stabilize your whipped cream, add a tablespoon of powdered sugar and a teaspoon of vanilla while whipping. This prevents the cream from weeping and making the cake soggy. The combination of fluffy cream and fresh berries creates an elegant dessert that’s not overly sweet. Moreover, this variation showcases the natural flavor of the strawberries rather than masking them with too much sugar.
Coffee Mocha Roll
Dissolve 2 tablespoons of instant espresso powder in the milk before adding it to your batter. Fill the cake with coffee-flavored buttercream or a mixture of whipped cream and melted chocolate. This sophisticated variation appeals to coffee enthusiasts and makes an excellent choice for adult gatherings. The bold coffee flavor pairs exceptionally well with chocolate, creating a dessert that rivals any café specialty.
Serving Suggestions for Every Occasion
Elegant Dinner Party Presentation
When serving your jelly roll for a special occasion, presentation matters tremendously. Slice the roll into even pieces about 3/4 inch thick, arranging them on individual dessert plates. Drizzle each slice with a complementary sauce – perhaps chocolate ganache for a chocolate roll or berry coulis for a fruit-filled version. Add a dollop of freshly whipped cream and a few fresh berries on the side. This plating transforms a simple dessert into an impressive finale that looks like it came from a professional bakery. Your guests will be thoroughly impressed by both the taste and the presentation.
Casual Family Gatherings
For more relaxed occasions, serve slices of jelly roll directly on a large platter, allowing everyone to help themselves. Pair it with a scoop of vanilla ice cream or a simple dusting of extra powdered sugar. This casual approach works perfectly for birthday parties, potlucks, or weekend family dinners. The beauty of a jelly roll is that it tastes wonderful whether served simply or elaborately.
Afternoon Tea Service
Cut your jelly roll into smaller, daintier slices perfect for teatime. Arrange them on a tiered serving stand alongside other pastries and finger sandwiches. The compact spirals look particularly attractive when displayed this way. Serve with freshly brewed tea or coffee for a delightful afternoon treat that feels both elegant and comforting.
Holiday Table Centerpiece
During holidays, consider making multiple jelly rolls with different fillings and arranging them on a decorative platter. This variety gives guests options and creates an impressive centerpiece. Dust each one differently – some with powdered sugar, others with cocoa powder – to distinguish between flavors at a glance.
Why People Love Jelly Rolls?
The enduring popularity of jelly rolls extends far beyond their delicious taste. First and foremost, there’s the undeniable visual appeal – that perfect spiral creates a stunning presentation that makes even novice bakers feel accomplished. When you slice into a homemade jelly roll and reveal those beautiful swirls, there’s an immediate sense of pride and achievement.
Beyond aesthetics, the flavor combination hits all the right notes. The light, airy sponge cake provides the perfect canvas for sweet fillings without being overwhelming. Unlike heavy layer cakes that can feel too rich, a jelly roll offers just enough sweetness to satisfy without leaving you feeling stuffed. This balance makes it an ideal choice for ending a meal, especially after something hearty.
Nostalgia plays a significant role as well. Many people have fond memories of watching grandmothers or mothers roll these cakes in the kitchen, and the aroma brings back those cherished moments. Creating a jelly roll connects us to previous generations and their baking traditions. In today’s fast-paced world, taking time to make something that requires patience and care feels meaningful and grounding.
The versatility factor cannot be overstated either. Whether you prefer fruity fillings, chocolate indulgences, or cream-based options, the basic recipe adapts beautifully to accommodate any taste preference. This flexibility means you’ll never get bored with making jelly rolls – there’s always a new combination to explore. Seasonal variations keep the dessert relevant year-round, from pumpkin spice in autumn to fresh berry in summer.
Additionally, jelly rolls offer an element of surprise. Guests often don’t know what filling awaits them until they take that first bite, creating a small moment of anticipation and discovery. This element of mystery adds an extra layer of enjoyment to the eating experience.
Benefits of Jelly Rolls Recipe
Portion Control Made Easy
Unlike a large cake that tempts you to cut bigger slices, jelly roll portions are naturally controlled. Each slice provides a satisfying treat without excessive calories. This built-in portion management helps those who struggle with moderation when it comes to desserts. You get the satisfaction of having dessert without the guilt of overindulgence.
Lower Fat Content
Compared to traditional layer cakes loaded with buttercream between each layer, jelly rolls typically contain less fat overall. The sponge cake itself relies more on eggs for structure than butter or oil. When filled with jam or fruit-based fillings, the fat content remains relatively modest. This makes jelly rolls a lighter option for those watching their fat intake.
Calcium and Protein from Eggs
The eggs in this recipe contribute valuable nutrients including protein, which helps with muscle maintenance and satiety. Each slice provides a small but meaningful amount of calcium, supporting bone health. While dessert shouldn’t be your primary protein source, these contributions add a nutritional silver lining.
Customizable Sugar Content
Making your jelly roll at home gives you complete control over sugar levels. You can reduce the sugar in the cake slightly without dramatically affecting texture, and you can choose lower-sugar jams or fruit-based fillings. This control isn’t possible with store-bought versions that often contain excessive sweeteners.
Drawbacks of Jelly Rolls Recipe
Let’s be honest – jelly rolls are desserts, and they contain a significant amount of sugar. Between the cake itself and the sweet filling, one slice can provide nearly your entire recommended daily added sugar intake. For individuals managing diabetes or watching sugar consumption, this presents a real concern. However, occasional enjoyment as part of a balanced diet remains perfectly reasonable for most people.
Refined Carbohydrates
The white flour used in traditional jelly rolls offers minimal nutritional value compared to whole grain alternatives. These refined carbohydrates digest quickly, potentially causing blood sugar spikes. Unfortunately, substituting whole wheat flour doesn’t work well because it creates a denser, less flexible cake that won’t roll properly. This limitation means you’re trading nutritional value for the unique texture that makes jelly rolls special.
Not Suitable for Common Allergies
Jelly rolls contain eggs, dairy, and gluten – three of the most common food allergens. This makes them off-limits for many people with dietary restrictions. While substitutions exist, they often require significant recipe adjustments and may not produce the same results. Those with celiac disease, egg allergies, or lactose intolerance need to approach this recipe with caution or seek specialized alternatives.
Calorie Dense Despite Light Texture
The fluffy texture can be deceiving – jelly rolls pack more calories than their airy appearance suggests. Because the cake feels light, people sometimes underestimate portion sizes and consume more than intended. Being mindful of serving sizes helps prevent accidental overconsumption.
Frequently Asked Questions
Why did my jelly roll crack when I tried to roll it?
Cracking typically happens for one of several reasons, and fortunately, most are preventable. The most common culprit is overbaking – even a minute or two extra in the oven can dry out the cake enough to cause cracks. Always check your cake at the minimum baking time and remove it as soon as it springs back when touched lightly. Another frequent cause is waiting too long before the initial roll. The cake must be rolled while still warm because the heat keeps it flexible and pliable. If it cools down completely before rolling, the structure sets and becomes brittle. Finally, rolling too tightly can stress the cake beyond its limits. Use gentle, even pressure and let the cake naturally curve around itself rather than forcing it into a tight spiral. If cracks do appear, don’t worry – a generous dusting of powdered sugar can hide minor imperfections quite effectively.
Can I make a jelly roll ahead of time?
Absolutely, and in fact, jelly rolls often taste better when made a day in advance. The resting time allows the flavors to meld together beautifully while the cake absorbs a bit of moisture from the filling, creating an even more tender texture. After completing your jelly roll, wrap it tightly in plastic wrap to prevent it from drying out in the refrigerator. Stored properly, it will stay fresh for up to four days, though it tastes best within the first two or three days. For longer storage, freezing works wonderfully – wrap the roll in both plastic wrap and aluminum foil, then freeze for up to three months. When you’re ready to serve, transfer it to the refrigerator and let it thaw slowly overnight. This gradual thawing prevents condensation from making the cake soggy.
What’s the difference between a jelly roll and a Swiss roll?
Interestingly, these terms refer to essentially the same dessert, with differences being more regional than technical. Americans typically call it a jelly roll, especially when filled with jam or jelly. The British prefer the term Swiss roll, regardless of the filling used. Some people make subtle distinctions, claiming that Swiss rolls specifically use cream fillings while jelly rolls use fruit preserves, but these distinctions aren’t universally recognized. The cake base and rolling technique remain identical. Both names are perfectly correct, so use whichever term feels more natural to you based on where you learned to bake.
Can I use cake mix instead of making the batter from scratch?
While you technically can use a boxed cake mix, it requires some adjustments because cake mixes are formulated differently than traditional jelly roll batter. Most importantly, you’ll need to beat the eggs separately and fold them in to create that essential airy texture. Simply following the box instructions produces a batter that’s too thick and won’t spread properly in the shallow pan. Additionally, the resulting cake might not be as flexible, increasing your chance of cracks when rolling. If convenience is your priority, using a mix can work, but scratch recipes truly produce superior results with better texture and flavor. The extra effort of making it from scratch is worthwhile for this particular dessert.
What filling works best for jelly rolls?
The ideal filling strikes a balance between flavor and texture. Traditional fruit jams and preserves work wonderfully because they spread easily and don’t make the cake soggy. Strawberry, raspberry, and apricot are classic choices that complement the vanilla cake beautifully. Beyond jam, stabilized whipped cream mixed with fruit creates a lighter, fresher option. Cream cheese frosting provides richness and tang that many people adore. Chocolate ganache or Nutella appeal to chocolate lovers. The key is choosing something spreadable but not too runny – very liquid fillings will soak through the cake and create a mess. Whatever you choose, bring it to room temperature before spreading to make application easier and more even.
How do I prevent the cake from sticking to the pan?
Proper preparation of your pan makes all the difference between easy removal and frustration. Always line your jelly roll pan with parchment paper, making sure it extends slightly beyond the edges so you have something to grip when inverting the cake. Some bakers also lightly grease the parchment with cooking spray or butter, though this isn’t always necessary if you’re using quality parchment. The key is inverting the cake immediately after baking – waiting allows it to cool and stick more firmly. When you flip the pan onto your powdered sugar-dusted towel, the cake should release cleanly. If you notice any sticking, gently work a thin spatula between the parchment and cake to release it.
My cake came out dense instead of fluffy – what went wrong?
Dense cake usually results from deflating the batter during mixing. When you beat the eggs, you’re incorporating air bubbles that make the cake rise. Overmixing after adding the flour or using a stirring motion instead of folding crushes these delicate bubbles. Always use a gentle folding technique and stop mixing as soon as the ingredients are just combined. Another potential cause is using eggs straight from the refrigerator – cold eggs don’t whip up as voluminously as room temperature ones. Make sure your eggs sit out for about 30 minutes before baking. Finally, expired or insufficient baking powder can fail to provide adequate lift. Check the expiration date on your baking powder and consider doing a quick test by adding a bit to hot water – it should bubble vigorously.
Can I use a different size pan?
Changing the pan size significantly affects your results, so it’s best to stick with the standard 10×15-inch jelly roll pan. A larger pan spreads the batter too thin, making it difficult to roll without tearing. Conversely, a smaller pan creates a thicker cake that won’t roll properly and may not bake evenly. If you absolutely must use a different size, understand that you’ll need to adjust the baking time accordingly. Thinner cakes bake faster while thicker ones need more time. Watch carefully and use the touch test – the cake should spring back when lightly pressed. However, for best results, investing in the proper pan size makes this dessert much easier to execute successfully.
How can I tell when my jelly roll is perfectly baked?
Learning to recognize perfect doneness takes a bit of practice, but several reliable indicators help. First, look at the color – the cake should be golden brown across the entire surface with slightly darker edges. Next, touch the center of the cake lightly with your finger. It should spring back immediately without leaving an indentation. If your finger leaves a dent, the cake needs more time. The edges should also just begin pulling away from the sides of the pan. Finally, a toothpick inserted into the center should come out clean or with just a few moist crumbs. Combining all these indicators gives you confidence that your cake is ready. Remember that underbaking slightly is better than overbaking, as a slightly moist cake rolls more easily than a dry one.
What should I do if my jelly roll cracks despite my best efforts?
First, don’t panic – even experienced bakers occasionally end up with cracks, and several fixes can salvage your dessert. Small cracks often become nearly invisible once you dust the roll with powdered sugar. For more significant cracks, you can make a simple glaze by mixing powdered sugar with milk and drizzling it over the cracks – this acts like edible glue while adding sweetness. Another clever solution involves spreading a thin layer of the same filling you used inside over the exterior before dusting with powdered sugar. This masks imperfections while adding extra flavor. If the cake completely breaks, all is not lost – you can transform it into a trifle by layering pieces with whipped cream and fruit in a glass bowl. The presentation changes, but the delicious flavors remain intact.
Jelly Rolls Recipe
Conclusion
Creating a perfect jelly roll represents one of those wonderful baking achievements that combines simplicity with elegance. Throughout this guide, we’ve explored every aspect of this classic dessert, from its rich European heritage to the precise techniques that ensure success. While the process might seem intimidating at first, remember that each attempt teaches you something new and brings you closer to mastery.
The beauty of a jelly roll lies not just in its stunning spiral presentation but in its remarkable versatility. Whether you prefer traditional jam fillings or want to experiment with creative combinations, this basic recipe adapts beautifully to countless variations. Moreover, the relatively simple ingredient list and straightforward method make it accessible even for bakers who are just starting their journey.
As you practice rolling your cakes, you’ll develop an intuitive sense for timing and technique. Those first attempts might not look perfect, but they’ll still taste absolutely delicious. Furthermore, the joy that comes from slicing into your creation and seeing that perfect swirl makes every bit of effort worthwhile.
So gather your ingredients, prepare your workspace, and embark on this delightful baking adventure. Whether you’re making a jelly roll for a special celebration or simply because you’re craving something sweet and homemade, you’re participating in a beloved tradition that has brought happiness to countless families through generations. Happy baking, and may your kitchen be filled with the wonderful aroma of freshly baked cake and the satisfaction of creating something truly special with your own hands.
