

Cherry Pie is one of those classic desserts that never fails to bring comfort and joy. Its golden, flaky crust and sweet-tart cherry filling make it a favorite for holidays, family gatherings, and summer picnics. The balance between the buttery crust and juicy cherries creates a rich flavor that feels both homemade and nostalgic. It’s simple to prepare, yet elegant enough to impress guests.
Origin
The history of Cherry Pie dates back to early European settlers who brought fruit pie traditions to America. The first cherry trees in the U.S. were planted in Michigan in the 1600s, which soon became the cherry capital. By the 19th century, Cherry Pie had become a symbol of American baking, often served at festivals and celebrations. Over time, it evolved with regional twists, but its essence remains the same — a sweet taste of tradition baked into every slice.
Ingredients of Cherry Pie Recipe with Pictures
- Fresh or Frozen Cherries
The heart of the pie. Cherries provide natural sweetness and a pleasant tartness.

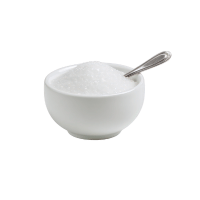
- Granulated Sugar
Enhances sweetness and balances the acidity of the cherries.
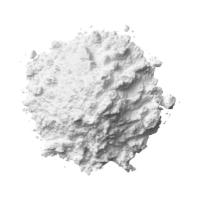
- Cornstarch
Thickens the filling and prevents it from becoming watery.
- Lemon Juice
Adds brightness and helps preserve the cherry color.
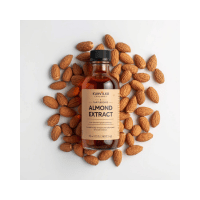
- Almond Extract
Gives a subtle nutty flavor that complements cherries beautifully.
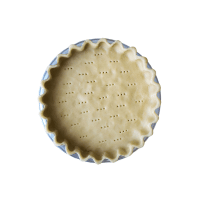
- Pie Crust (homemade or store-bought)
Forms the base and top of the pie, giving it structure and a buttery texture.
- Butter
Adds richness and enhances flavor.
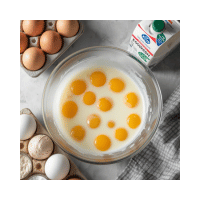
- Egg Wash (egg + milk)
Gives the crust a glossy, golden finish.


Ingredients with Quantities
| Ingredient | Quantity |
|---|---|
| Fresh or frozen cherries (pitted) | 4 cups |
| Granulated sugar | 1 cup |
| Cornstarch | 3 tablespoons |
| Lemon juice | 1 tablespoon |
| Almond extract | 1 teaspoon |
| Unsalted butter | 2 tablespoons |
| Pie crust (top and bottom) | 2 sheets |
| Egg (for egg wash) | 1 |
| Milk | 1 tablespoon |
Step by Step Cherry Pie Recipe
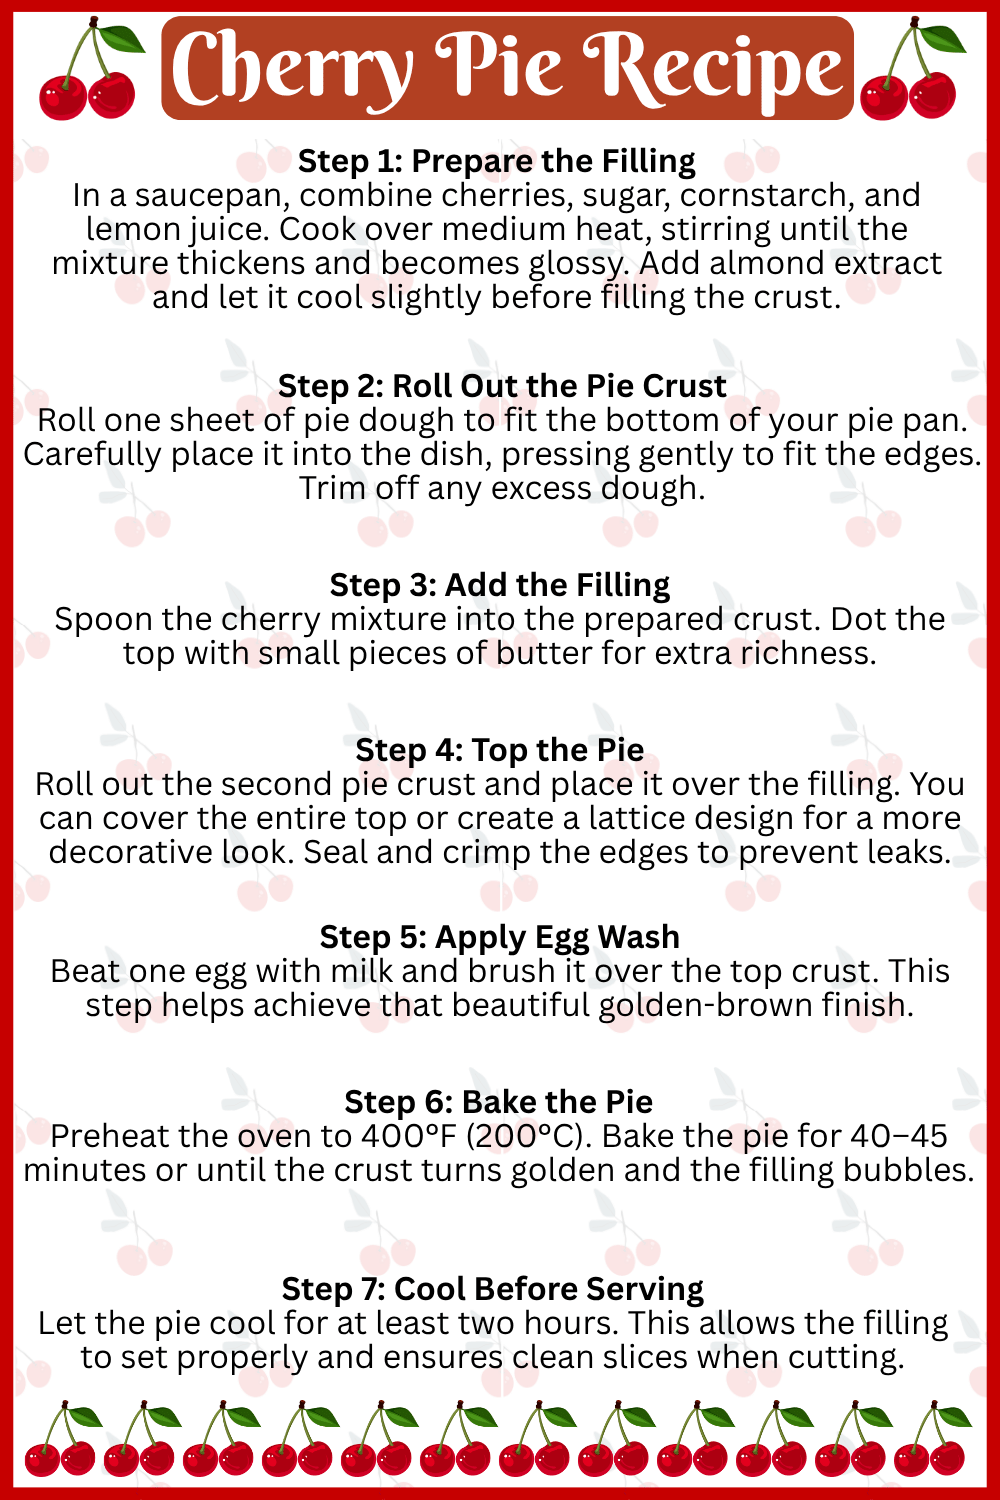
Step 1: Prepare the Filling
In a saucepan, combine cherries, sugar, cornstarch, and lemon juice. Cook over medium heat, stirring until the mixture thickens and becomes glossy. Add almond extract and let it cool slightly before filling the crust.
Step 2: Roll Out the Pie Crust
Roll one sheet of pie dough to fit the bottom of your pie pan. Carefully place it into the dish, pressing gently to fit the edges. Trim off any excess dough.
Step 3: Add the Filling
Spoon the cherry mixture into the prepared crust. Dot the top with small pieces of butter for extra richness.
Step 4: Top the Pie
Roll out the second pie crust and place it over the filling. You can cover the entire top or create a lattice design for a more decorative look. Seal and crimp the edges to prevent leaks.
Step 5: Apply Egg Wash
Beat one egg with milk and brush it over the top crust. This step helps achieve that beautiful golden-brown finish.
Step 6: Bake the Pie
Preheat the oven to 400°F (200°C). Bake the pie for 40–45 minutes or until the crust turns golden and the filling bubbles.
Step 7: Cool Before Serving
Let the pie cool for at least two hours. This allows the filling to set properly and ensures clean slices when cutting.
Step by Step Cherry Pie Recipe
Common Mistakes to Avoid
Using too much liquid: Many beginners don’t drain the cherries properly or overfill the pie, leading to a soggy crust. Always make sure the filling has thickened before baking.
Skipping the cooling time: Cutting the pie too early causes the filling to spill out. Patience helps the filling firm up for perfect slices.
Overbaking the crust: It’s easy to burn the edges. Cover them with foil halfway through baking to avoid over-browning.
Neglecting the egg wash: This small step makes a big difference. Without it, the crust may look pale instead of beautifully golden.
Tips for the Perfect Cherry Pie Recipe
Use fresh cherries when possible: Fresh cherries provide the best flavor and texture. Frozen ones work too, but thaw and drain them first.
Add a pinch of salt to the crust: A small amount of salt enhances the overall flavor and balances sweetness.
Chill the dough before baking: Cold dough prevents the crust from shrinking and helps create a flaky texture.
Bake on the lower oven rack: This ensures the bottom crust cooks evenly and doesn’t stay doughy.
Variations of Cherry Pie
Chocolate Cherry Pie: Add a layer of melted chocolate between the crust and filling for a rich twist.
Cherry Almond Crumb Pie: Replace the top crust with a crumble of oats, brown sugar, and almonds for a nutty crunch.
Mini Cherry Hand Pies: Make small, portable versions using the same filling — perfect for snacks or parties.
Cherry and Mixed Berry Pie: Combine cherries with blueberries or raspberries for a colorful and tangy blend.
Serving Suggestions
Cherry Pie tastes best when served warm or at room temperature. Pair it with a scoop of vanilla ice cream, whipped cream, or a drizzle of chocolate syrup for extra indulgence. It also goes well with a hot cup of coffee or tea, making it ideal for both dessert and afternoon treats.
Nutritional Information
| Nutrient | Amount (per slice) |
|---|---|
| Calories | 320 kcal |
| Carbohydrates | 48 g |
| Protein | 3 g |
| Fat | 14 g |
| Fiber | 2 g |
| Sugar | 25 g |
| Sodium | 160 mg |
Why People Love This Dessert ?
People love Cherry Pie for its comforting taste and beautiful balance of flavors. The sweet-tart filling wrapped in a flaky crust brings back memories of home baking and family gatherings. It’s also incredibly versatile — it fits every season, from summer picnics to cozy winter dinners.
Benefits of Cherry Pie Recipe
1. Rich in Antioxidants
Cherries, the main ingredient, are packed with antioxidants like anthocyanins and quercetin. These compounds help fight free radicals in the body, reducing inflammation and protecting cells from damage. Regular intake of such antioxidants can support heart health and lower the risk of chronic diseases.
2. Good Source of Vitamins
Cherries provide vitamins A, C, and K, which are essential for overall well-being. Vitamin C boosts the immune system and promotes glowing skin, while vitamin A supports healthy vision. Including cherries in desserts like pie allows you to enjoy these nutrients in a delicious way.
3. Natural Mood Booster
Cherry Pie can lift your mood instantly. The natural sweetness of cherries, combined with the comfort of a warm, buttery crust, triggers a pleasant emotional response. It’s often associated with joy, nostalgia, and relaxation, making it perfect for celebrations or stress relief.
4. Energy Provider
A slice of Cherry Pie gives a quick burst of energy due to its carbohydrate content. It’s ideal when you need a light dessert after a meal or a sweet pick-me-up during the day. Athletes and active individuals sometimes enjoy a small portion for a fast energy boost.
5. Homemade Versions Can Be Healthier
When prepared at home, you can control the sugar, butter, and crust thickness. Using fresh cherries and whole-grain crust makes it a more wholesome dessert. Homemade Cherry Pie eliminates preservatives found in store-bought versions.
Disadvantages of Cherry Pie Recipe
1. High Sugar Content
Cherry Pie typically contains a significant amount of sugar, especially in store-bought or canned versions. While it enhances flavor, excessive sugar intake can lead to weight gain, increased blood sugar levels, and dental problems. Diabetics should enjoy it in moderation or opt for sugar substitutes.
2. High in Calories and Fat
The buttery crust, while delicious, adds calories and saturated fat. Frequent consumption can contribute to cholesterol buildup and heart-related issues if not balanced with a healthy diet. Portion control is key to avoiding excess calories.
3. Not Suitable for Strict Diets
Those on low-carb or weight-loss diets may find Cherry Pie challenging to fit into their meal plans. Even small servings contain a considerable amount of carbohydrates and fats, making it more of an occasional treat.
4. Possible Artificial Additives
Commercial pies often include artificial flavors, preservatives, and color enhancers to extend shelf life. These additives can reduce nutritional quality and, in some cases, cause sensitivities in certain individuals.
5. Can Cause Digestive Discomfort (in excess)
Eating large portions, especially late at night, can cause bloating or indigestion due to high sugar and fat content. It’s best enjoyed in moderation, preferably after a balanced meal.
FAQS
1. Can I use canned cherries?
Yes, but drain the syrup first to prevent a soggy filling.
2. What type of cherries is best?
Tart cherries like Montmorency work best for traditional pies.
3. How can I thicken my filling without cornstarch?
You can use flour or tapioca starch as substitutes.
4. How do I keep the crust from getting soggy?
Brush the bottom crust with egg white before adding the filling.
5. Can I make Cherry Pie ahead of time?
Yes, bake it a day before and store it at room temperature.
6. Should I refrigerate leftover pie?
Yes, cover and refrigerate it to keep it fresh for up to 3 days.
7. Can I freeze Cherry Pie?
Definitely. Wrap it tightly and freeze for up to 3 months.
8. What if I don’t have almond extract?
You can replace it with vanilla extract, though the flavor will differ slightly.
9. How can I make it less sweet?
Reduce the sugar by ¼ cup and use tart cherries for balance.
10. How do I reheat Cherry Pie?
Warm it in an oven at 350°F for 10 minutes to revive its crispness.

Cherry Pie Recipe
Conclusion
Cherry Pie is more than just a dessert — it’s a slice of tradition and comfort baked into one dish. With its golden crust, luscious filling, and nostalgic flavor, it continues to be a beloved treat across generations. Whether you’re baking it for a celebration or just because, a homemade Cherry Pie always brings a little joy to every table.
